Leelee's Garden
  • Home
  • Flowers
  • Workshop Calendar
    • Tropical Terrarium Workshop
  • Offerings
  • About
  • Contact
  • Blog
  • Privacy Policy

Create your own Floral Lantern

5/13/2017

0 Comments

 
​Wow, this week we’ve done a bit of everything…cards, terrariums, and craft cocktails. What I’ve enjoyed most about this Mother’s Day DIY series is making projects I’ve been meaning to try and sharing them with you! Today’s is another project I’ve been wanting to do for a while. I’m finishing up the week with two floral projects. Mother’s Day is one of the biggest florist holidays. Why not try your hand at making your own florals for mom this year?
 
Today I’m sharing floral lanterns! These make such unique centerpieces and would work for a mother’s day gift, girl’s brunch, summer dinner outdoors, or even a diy wedding. What’s fun about this project is that you can change up what you put inside your lanterns based on the season and availability. 
Picture
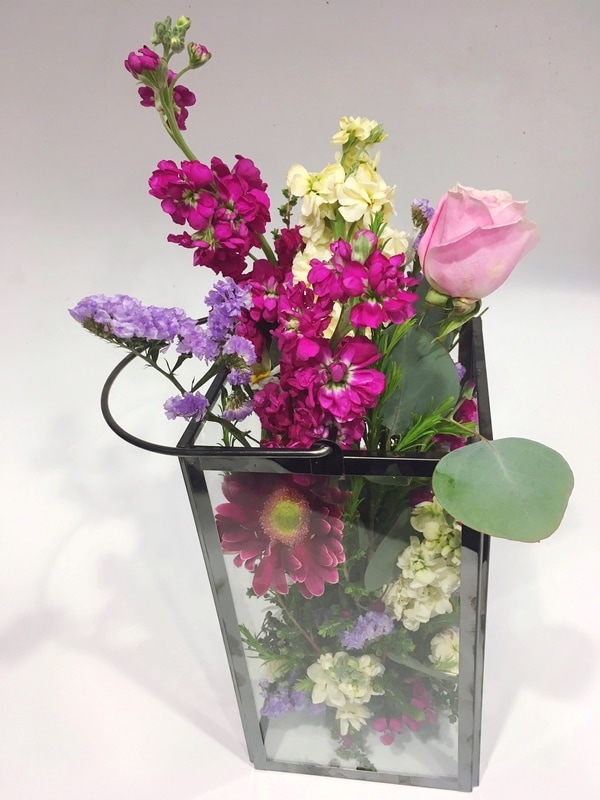
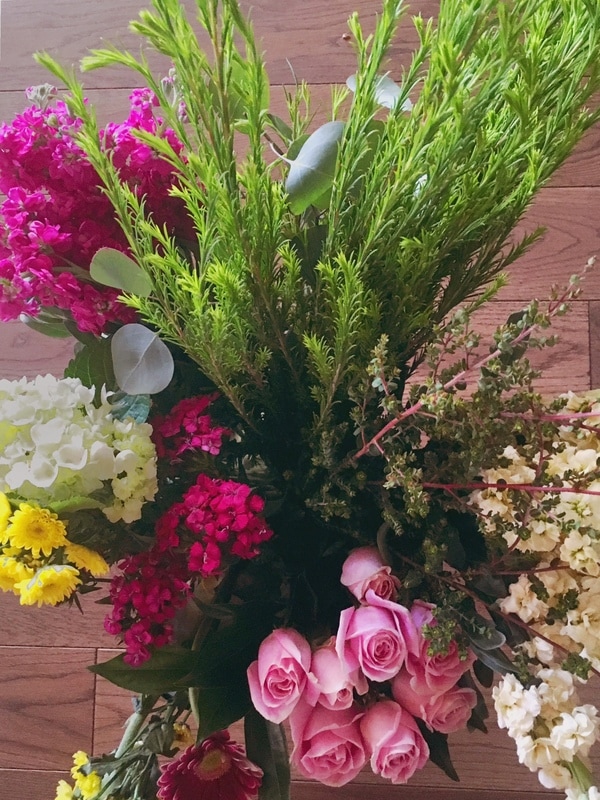
What you need:
Glass Lantern
Iglu floral foam and holder that fits easily in lantern (wet foam like oasis)
Floral preservative (optional)
Assortment of flowers (here I used white and magenta stock, white daisies, a magenta gerbera daisy, statice, and a couple pink roses)
Assortment of greens
 
  1. Soak the foam and holder in a bowl of water with floral preservative.
  2. Place foam in lantern to gauge the size of the arrangement. In my case, I chose to design out an inch around the sides and upwards beyond the container. The size you go for is up to you, but keep it in mind as you design.
  3. Remove foam from lantern. You’ll design outside of the container.
  4. Add greens first to create the overall shape of the arrangement and cover the foam and holder. Aim to cover most of the floral foam, especially around the bottom sides. You don’t want to see much of the foam holder. You’ll need to cut short 1-2” pieces as well as long pieces to create the overall shape. Cut greens, take off any bottom leaves and press into foam. Try not to rearrange (will help you avoid getting the “swiss cheese” effect of large holes in foam that don’t hold flowers well).
  5. Add flowers. Since you’re making an all around arrangement, add flowers and turn the whole design. Add more flowers and turn again. The idea with this one is a wild botanical look, so it doesn’t have to be precise. Add what looks good to you, a mix of colors, shapes and sizes. The main design guideline is the size. Try to keep the design in the shape you planned in step 2. As you add flowers, be sure to take off any undesired leaves (I do this with daisies) and leaves on sections of stems that will go into foam.
  6. Gently lower arrangement into lantern. You may need to adjust blooms so they face out.
  7. Admire your first floral lantern!
Interested in this project, but don’t want to try it solo? I’m going to start offering this floral lantern project as a workshop this summer. Check out our public events or book a private party!
0 Comments

DIY Lavender Craft Cocktail Essentials:

5/11/2017

1 Comment

 
If you know a mom who's more like mine (prefers Prince and a good craft cocktail to plants), try making her a Purple Rain this week. I've been wanting to play with cocktail making for a while and used this DIY Mother's Day Week as my excuse to have a night of at-home bartending with Mom. I'm sharing recipes for lavender bitters and lavender honey simple syrup, ingredients that will take you a long way in lavender cocktail adventures. Want something a little more mellow? Mixed with lemon juice and water, the simple syrup will make a tasty lavender lemonade. 

Lavender Honey Simple Syrup

Combine 2 parts dried lavender, 3 parts honey, and 3 parts hot water in a dish or bowl. Let seep for 30 minutes. Strain through  cheesecloth ​or fine strainer.
With this simple syrup, you're all set to make a Purple Rain. Get the recipe here.

Lavender Bitters

(Adapted from The Domestic Mixologist)

  • 2 Tablespoons dried lavender
  • 1/2 teaspoon freshly grated ginger
  • Zest of 1/2 an orange
  • 1/2 teaspoon vanilla 
  • 4 cloves
  • 4 ounces whisky
  • Jar for infusing (or Sous-vide*)
  • Cheesecloth

Mix all ingredients in your jar and seal and let steep for 2 weeks, and shake several times to remix. After 2 weeks, strain lavender bitters through cheesecloth or fine strainer. Store bitters in a jar or glass bottle with dropper (ideal for bitters). 

*Since I wanted to make bitters and cocktails the same night, I used a sous-vide water oven. For the sous-vide method, place all ingredients in a ziplock bag. Give a sous-vide water bath at 140F for 1 hour. Let cool and store in a jar or glass bottle with dropper. 

There are tons of ways to use these flowery bitters in craft cocktails. One new favorite is the Lavender Honey Sidecar.
1 Comment

How to Make a Basic Terrarium

5/9/2017

0 Comments

 
Mother’s Day series day 2! Don’t forget about the giveaway (see details below).
 
Next up are terrariums! I typically make and teach air plant terrariums, but wanted to get back into more traditional terrarium making for this Mother’s Day week. I had so much fun making these yesterday, playing with plants, glass, shells, gems and pebbles! You can find many versions of terrarium tutorials online. This recipe is for a basic terrarium, which you can adjust based on plants you use, glassware, and "toppings." Some plant crafters add more bottom layers (pebbles, sand, etc.). I’ve found charcoal and soil to work well, but you can add more ingredients if you want to play with the look. You can find the charcoal in pet stores in the aquarium department. Charcoal acts as a water filter, which you need in an enclosed planter to avoid algae growth.
Picture
Picture
Basic Terrarium
 
What you need:
  • Glassware (I used a low square votive holder, hurricane vase and funky terrarium vessel)
  • Houseplants (there are many lists of appropriate plants to use. I used African violet, ponytail palms and multiple types of ferns I found at a local nursery).
  • Moist potting soil
  • Charcoal pellets
  • Toppings! (shells, pebbles, gemstones, etc.)
 
  1. Add a thin layer of charcoal pellets to the bottom of the vase.
  2. Fill glass about a third of the way with potting soil (here you can layer pebbles or sand first if you wish).
  3. Dig holes for your chosen plants and plant, making sure the crown of your plant is flush with the top of the soil.
  4. Add toppings!
 
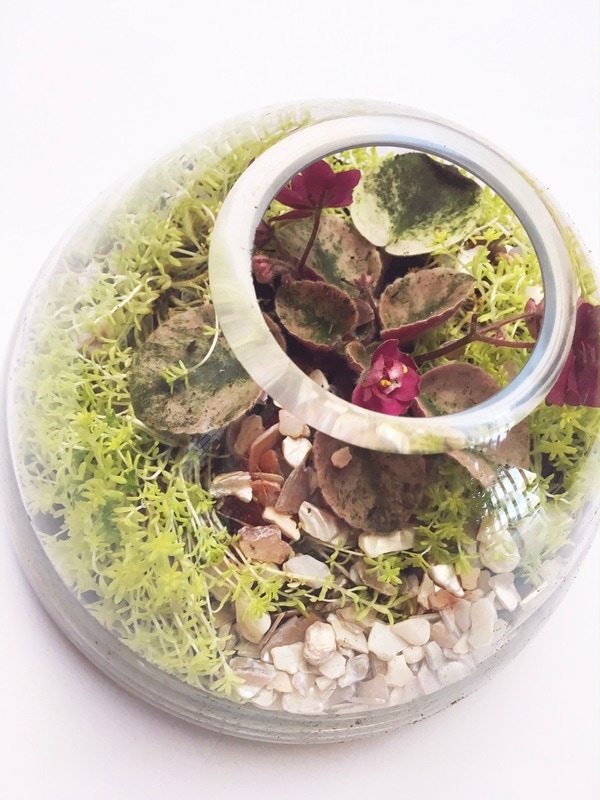
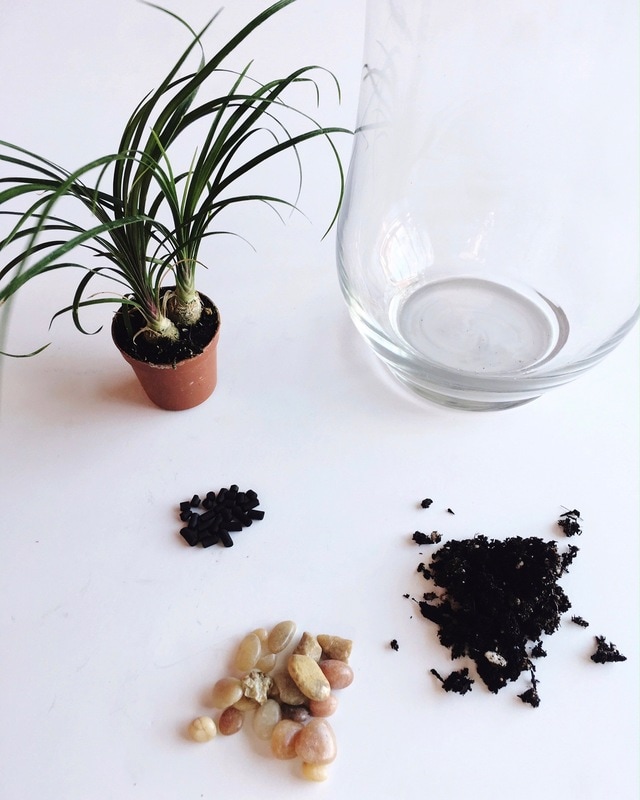
Care for your terrarium depends on the plants you use. I choose indoor plants that need filtered light. I check the soil regularly for dryness and water when the soil is no longer moist. For these terrariums I chose plants that I like, but some will not last forever in their terrarium homes. I think of terrariums as long term arrangements; eventually expect your plant buddies to grow out of their containers. You can repot them and replace with new, small plant babies.
​Instagram Giveaway! I’m giving away one of my wildflower terrarium necklaces launching soon in the Leelee’s Garden botanical craft shop. If you know me, you’ve probably seen me wearing one of these. I’ll post Mother’s Day DIY ideas everyday here and on Instagram @leeleesgarden. If you like a post this week and tag 2 friends you’ll get 1 entry. If you MAKE one of these projects this week, share and tag @leeleesgarden, you’ll get 5 entries. Not on Instagram? You can also email me a photo of what you’ve made at leelee@leeleesgarden.com and get 5 entries. Winner Announced May 15!
0 Comments
<<Previous
Forward>>
    go to recent articles:
    Found Beauty: Floral Foraging for Beginners

    Sage 3 Ways:
    Grow + Make + Sip

    10 Plants to Re-wild your Desk

    Picture
      ​Don't miss a blog.
      Subscribe to receive our free newsletter delivered to your inbox, plus special invitations and updates.
    SIGN ME UP

    meet me
    Picture
    Hi I'm Leelee! I'm a botanical artist, educator and owner of Leelee's Garden. I host pop-up plant and flower workshops around the country, do design projects, and share botanical tidbits in my newsletter once or twice a month.
    ​
    Photo by: Paco and Betty

Home

PRIVACY POLICY

About

Contact

COPYWRIGHT © 2022
  • Home
  • Flowers
  • Workshop Calendar
    • Tropical Terrarium Workshop
  • Offerings
  • About
  • Contact
  • Blog
  • Privacy Policy