
How it works:
1. Every day I make a holiday project.
2. I share on Instagram stories and post the recipe here.
3. Choose what you're inspired to make (or try everything!)
4. Share your creations with #makemagic and tag @leeleesgarden.
1. Every day I make a holiday project.
2. I share on Instagram stories and post the recipe here.
3. Choose what you're inspired to make (or try everything!)
4. Share your creations with #makemagic and tag @leeleesgarden.
December 15, 2017
Day 10: Make a Wow Factor
Tall Gladiola Floral Design
Day 10: Make a Wow Factor
Tall Gladiola Floral Design
Don't get me wrong. I love floral designers. There are so many talented men and women out there making INCREDIBLE designs. But, before I started designing as a business and before I had a wholesale license I was frustrated by how so many floral design books featured flowers and materials that were so hard to find for a normal person. So, for this weekend of holiday parties, I'm sharing a couple simple designs that have 5 or fewer ingredients, and mostly things you can get in a grocery store or home and garden store. Tonight we have neighbors coming over for wine and desserts.
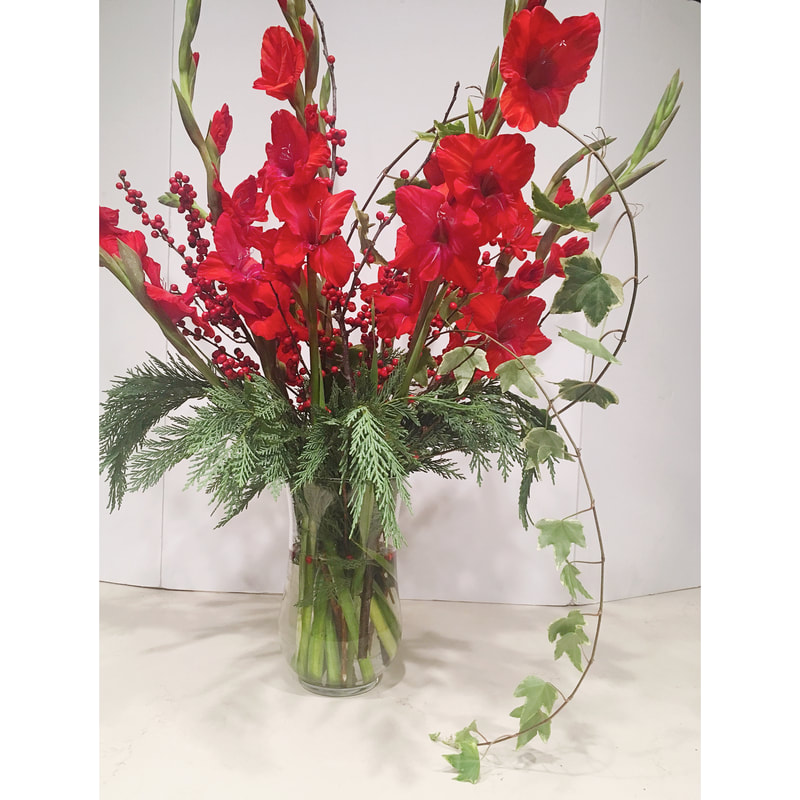
I'm starting off with a tall gladiola design. Don't you love glads? They are gorgeous and wallet friendly, and make a statement for sure. But they can be tricky to design with. Basically plop them in a vase, and you're set, right? Tonight I'll show you a little more fun design with these holiday favorites. The most common question I get in basic floral classes is "how do I know how tall to make it?" For tall designs like this, I aim for 1.5 - 2 times the height of the arrangement above the vase.
I'm starting off with a tall gladiola design. Don't you love glads? They are gorgeous and wallet friendly, and make a statement for sure. But they can be tricky to design with. Basically plop them in a vase, and you're set, right? Tonight I'll show you a little more fun design with these holiday favorites. The most common question I get in basic floral classes is "how do I know how tall to make it?" For tall designs like this, I aim for 1.5 - 2 times the height of the arrangement above the vase.
|
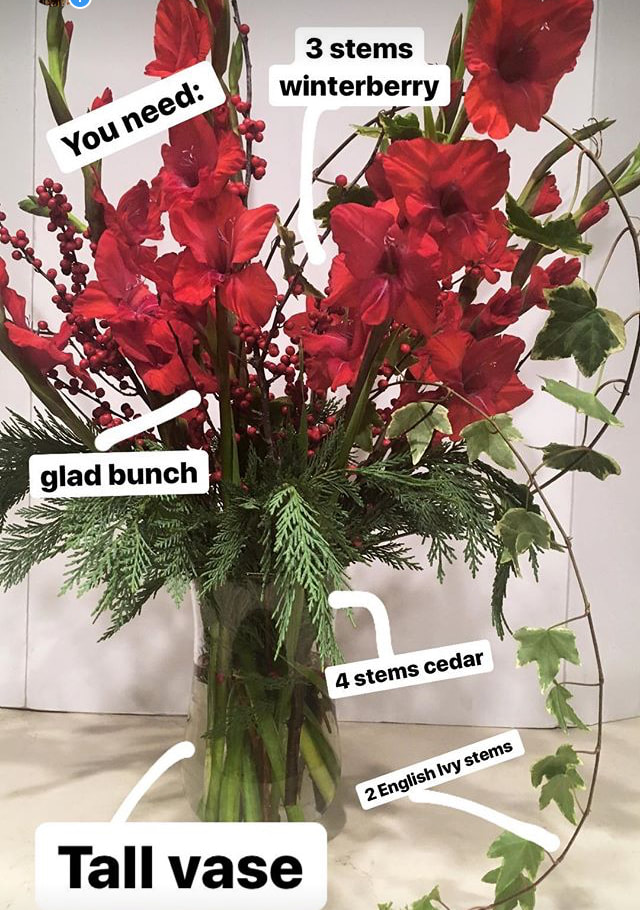
What you need:
Make It: 1. Start by adding gladiolas to a vase 2/3 full of water. I suggest placing 7 around the perimeter pointing out in a circle, and and 3 in an inner central circle. Give each stem a fresh cut. 2. Add cedar, cleaning leaves off stems that will be below water. I like these as a collar above the vase, but you can play with how to place these. 3. Add 3 stems winterberry to the center. 4. Add ivy. I add both to the same side, one as a loop that trails out to the bottom of the vase, and a second I tuck back into the vase to make a full curve. Again, play with what you like best! |
December 14, 2017
Day 9: Make Plant Based Holiday Treats
Day 9: Make Plant Based Holiday Treats
It's not Christmas to me without making some holiday treats. But lately, my usuals haven't been feeling so great on my body. So, I reached out to my friend Katie of Katie's Healing Kitchen and asked for some holiday treat ideas that are plant based and still feel like something special. I made both recipes and LOVE them! Thanks Katie! These will make such good friend gifts and stocking stuffers (or just really good snacks...more likely).
Maple Cinnamon Granola Clusters Makes 3 cups
Ingredients:
Salted Pistachio + Cherry Bark
Ingredients:
Pour chocolate on a parchment lined baking sheet.
Sprinkle remaining cherries and pistachios. Sprinkle lightly with salt.
Place in the fridge for at least 1/2 an hour.
Break a part and enjoy. Store in the fridge.
Other Chocolate Bark Ideas . . . . .
Crushed pretzel + peanut butter swirl
Crushed peppermint candies
Superfood's (goji berries, cacao nibs, golden berries)
Ingredients:
- 1 cup chopped nuts (walnuts, cashews, almonds etc...)
- 1 cup seeds (pumpkin, sunflower, hemp etc....)
- 1 cup unsweetened shredded coconut
- 2 tablespoons coconut oil, melted
- 1/3 cup maple syrup
- 1/2 teaspoon powdered stevia
- 2 teaspoons cinnamon
- 1/2 teaspoon salt (or more to taste)
Salted Pistachio + Cherry Bark
Ingredients:
- 2 bars high-quality fair trade chocolate, 70% or higher
- 1/4 cup dried cherries (divided)
- 1/4 cup pistachios (divided)
- few pinches high quality salt (I like Maldon)
Pour chocolate on a parchment lined baking sheet.
Sprinkle remaining cherries and pistachios. Sprinkle lightly with salt.
Place in the fridge for at least 1/2 an hour.
Break a part and enjoy. Store in the fridge.
Other Chocolate Bark Ideas . . . . .
Crushed pretzel + peanut butter swirl
Crushed peppermint candies
Superfood's (goji berries, cacao nibs, golden berries)
December 13, 2017
Day 8: Make a Living Wreath
Day 8: Make a Living Wreath
How-to coming tomorrow (12/15). In the meantime, see the video on Instagram. Ask Leelee if you want to make this and have any questions.
December 11, 2017
Day 7: Make Sugar Scrub Gifts
Day 7: Make Sugar Scrub Gifts
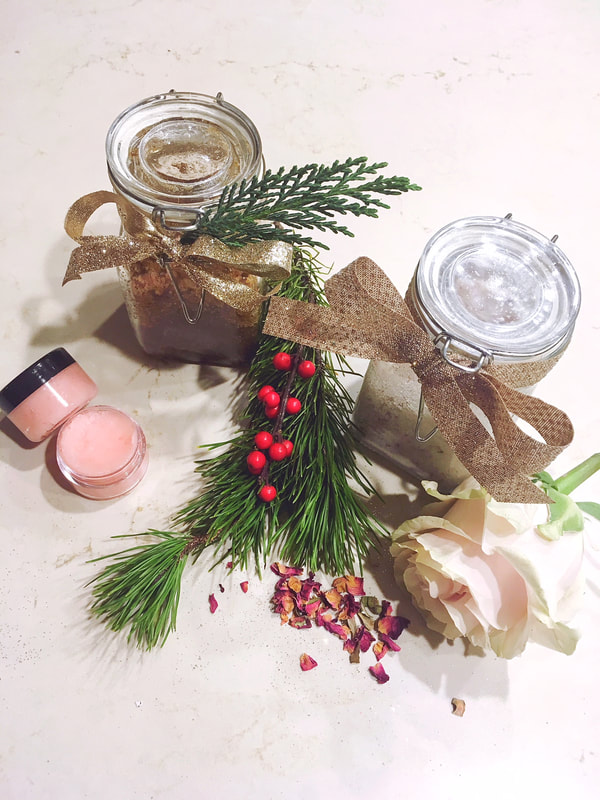
Frankincense Brown Sugar Scrub - this is the best scrub ever!
Make It:
1. Mix together all ingredients in a medium bowl.
2. Store in an air tight container.
Rose Sugar Scrub
1. Mix together all ingredients in a medium bowl.
2. Store in an air tight container.
Peppermint Kiss Lip Scrub
1. Mix together all ingredients in a medium bowl.
2. Store in an air tight container or in mini cosmetic jars as gifts.
To use: take a pinch and rub across your lips, then wipe off to exfoliate.
- 1 cup brown sugar
- 2 tablespoons Himalayan salt, finely ground
- 4 tablespoons avocado oil
- 4 tablespoons jojoba oil
- 1 tablespoon honey
- 12 drops frankincense essential oil
- 4 drops lavender essential oil
- 2 drops cinnamon essential oil
- 2 drops clove essential oil
Make It:
1. Mix together all ingredients in a medium bowl.
2. Store in an air tight container.
Rose Sugar Scrub
- 1/2 cup fine sea salt
- 2 tablespoons coarse himalayan salt
- 6 drops rose essential oil (or to your desired scent)
- 4 tablespoons jojoba oil (or to your desired consistency)
- 2 tablespoons crushed dried rose petals (optional)
- 1/2 teaspoon vanilla (optional)
1. Mix together all ingredients in a medium bowl.
2. Store in an air tight container.
Peppermint Kiss Lip Scrub
- 1/2 cup white sugar
- 1/4 cup coconut oil
- 4 drops peppermint essential oil or peppermint extract
- 1/2 teaspoon vanilla extract
- a few shakes red sugar crystal sprinkles (optional)
1. Mix together all ingredients in a medium bowl.
2. Store in an air tight container or in mini cosmetic jars as gifts.
To use: take a pinch and rub across your lips, then wipe off to exfoliate.
December 10, 2017
Day 6: Make a Botanical Bath Soak
Day 6: Make a Botanical Bath Soak
A writer and teacher I've admired lately is Kitty Cavalier. She writes about the beauty of self care and has a ritual she encourages she calls Spa Sunday, a day of the week to make sure you pamper yourself, even if it's just in your own home. Today, for Spa Sunday, I'm making bath soaks with (mostly) household ingredients. Let's face it. The holiday season can be stressful. Give yourself a break tonight and make your own botanical bath soak to get ready for the week ahead. Or make these this week as beautiful gifts for friends and family. To use, you can add 1-2 cups directly to a hot bath or you can put in a tea bag to avoid fishing out ingredients afterwards. I'm sharing two recipes tonight and a few more botanical DIY bath projects tomorrow too! Enjoy a little #makemagic retreat time to get the week started.
Relaxing Oatmeal Lavender Bath Soak
1. Grind oatmeal in a blender or food processor until it has a flour-like texture.
2. Mix with remaining ingredients in a medium bowl.
3. Store in an air tight container.
Hangover Cure Bath Soak
This detox soak with rejuvenating rosemary and calming chamomile would make a just right holiday hangover fix.
Adapted from BrenDid blog.
1. Mix together all ingredients in a medium bowl.
2. Store in an air tight container.
- 1/2 cup oatmeal
- 2 tablespoons lavender flowers
- 4 drops lavender oil
- 2 cups epsom salt
1. Grind oatmeal in a blender or food processor until it has a flour-like texture.
2. Mix with remaining ingredients in a medium bowl.
3. Store in an air tight container.
Hangover Cure Bath Soak
This detox soak with rejuvenating rosemary and calming chamomile would make a just right holiday hangover fix.
Adapted from BrenDid blog.
- 3 cups epsom salt
- 3/4 cup baking soda
- 15 drops rosemary essential oil
- 3 bags chamomile tea
- dried rosemary, minced (optional)
1. Mix together all ingredients in a medium bowl.
2. Store in an air tight container.
December 9, 2017
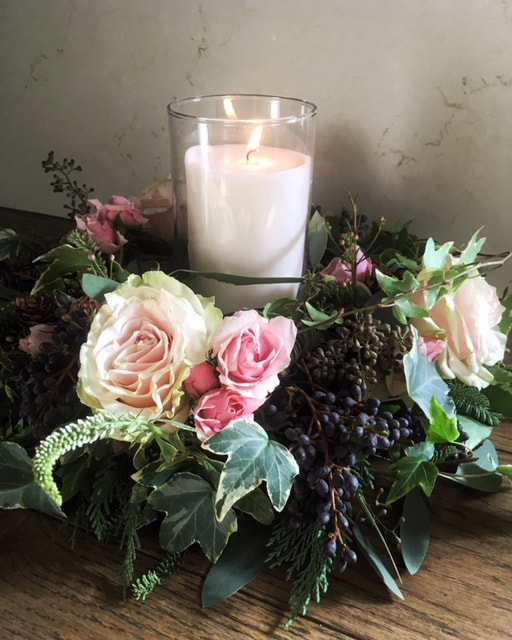
Day 5: Make a Floral Wreath Centerpiece
Day 5: Make a Floral Wreath Centerpiece
Yesterday I got to try this project I've been eyeing on pinterest for ages: a floral wreath centerpiece. It's finallly the right time of year! I love the classic Victorian holiday vibe. It makes me want to sip tea and read Little Women all day long.
Want to make one with me? I'm teaching two hands-on workshops this month, one in Los Angeles and one in San Diego. You can get tickets here. Or send me a message if you'd like me to make one for you and deliver it to you in SoCal!
Want to make one with me? I'm teaching two hands-on workshops this month, one in Los Angeles and one in San Diego. You can get tickets here. Or send me a message if you'd like me to make one for you and deliver it to you in SoCal!
What you need:
Make It:
1. Soak floral foam wreath until completely wet.
2. Start by choosing how high and wide your wreath will go. Keep this in mind as you start designing.
3. Begin designing with greens. Using a variety of greens, begin covering floral foam. Continue turning as you go, so you keep designing evenly.
4. Add 3 roses and then spray roses.
5. Add filler berries, wax flower tips and seeded eucalyptus berries, continuing to turn as you design.
6. Add additional flowers and greens as needed to fill in any gaps.
7. Finish with a vase and pillar candle.
- wreath floral foam (I used 8" diameter)
- assorted greens (shown here: cedar, noble fir, variegated ivy, and seeded eucalyptus)
- privet berries
- 3 standard roses
- 3 stems spray roses
- 1 pine cone
- veronica
- wax flower tips
- tall glass cylindrical vase
- pillar candle
- floral shears
Make It:
1. Soak floral foam wreath until completely wet.
2. Start by choosing how high and wide your wreath will go. Keep this in mind as you start designing.
3. Begin designing with greens. Using a variety of greens, begin covering floral foam. Continue turning as you go, so you keep designing evenly.
4. Add 3 roses and then spray roses.
5. Add filler berries, wax flower tips and seeded eucalyptus berries, continuing to turn as you design.
6. Add additional flowers and greens as needed to fill in any gaps.
7. Finish with a vase and pillar candle.
December 8, 2017
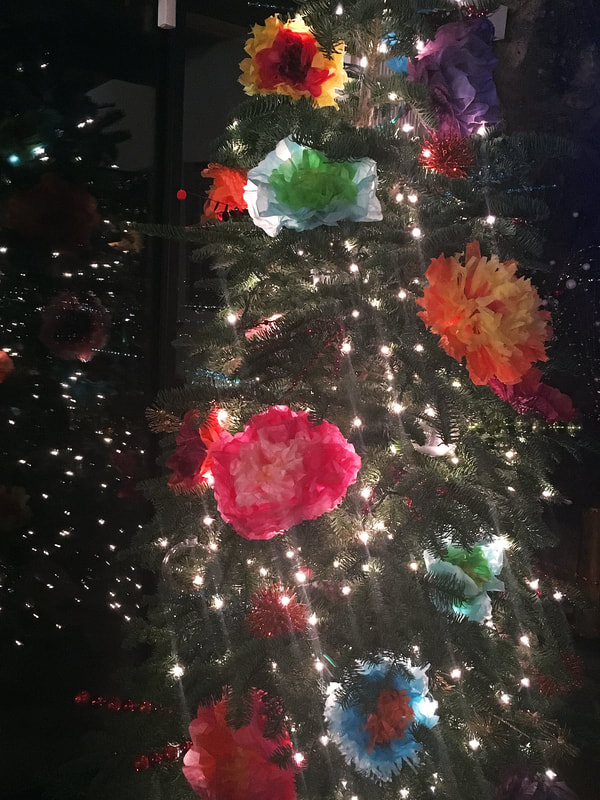
Day 4: Make Paper Flowers
Day 4: Make Paper Flowers
I grew up in a household that took Christmas decor very seriously. We had a big tree each year with just right lights and just right decor. This year, though, my mom was up for something different and asked me to take over. She wanted us to make paper ornaments, something she did as a little girl with her mom. So we did! I've seen paper flowers all over this year, gorgeous peonies and roses that look real and never fade. Our versions aren't so realistic, but I love what I'm calling our Fiesta Tree (or Dr. Seuss?)! Not perfect, but just right for this crafty Christmas.
What you need:
- assorted tissue paper
- scissors
- pipe cleaners
Make it:
1. Choose the size of flower you want to make and colors. You can use full sheets, half sheets or quarter sheets of tissue paper. Pick a color for the outer petals, inner petals, and center fringe. You will need 2 sheets for the outer petals, 2 sheets for inner petals and 1 sheet for the center.
2. Cut each layer of the flower smaller than the last. The outer petals should be the widest. Cut down the inner petal sheet at least a couple inches. Cut the center sheet another couple inches.
3. Lay sheets longways on top of each other and accordion fold.
4. Separate colors. Cut the ends of the outer and inner petals, so they are rounded (to look like petals). Cut slits into either end of the center sheet to make about 1/4 inch fringe.
5. Replace sheets back on top of each other and bunch back together into the original accordion.
6. Place pipe cleaner in the center of the bunched sheets. Fold in half and twist. Fan out the flower, which should now look like a circle.
7. Gently pull up the center fringe, then each layer of the petals separately to form the flower shape.
December 7, 2017
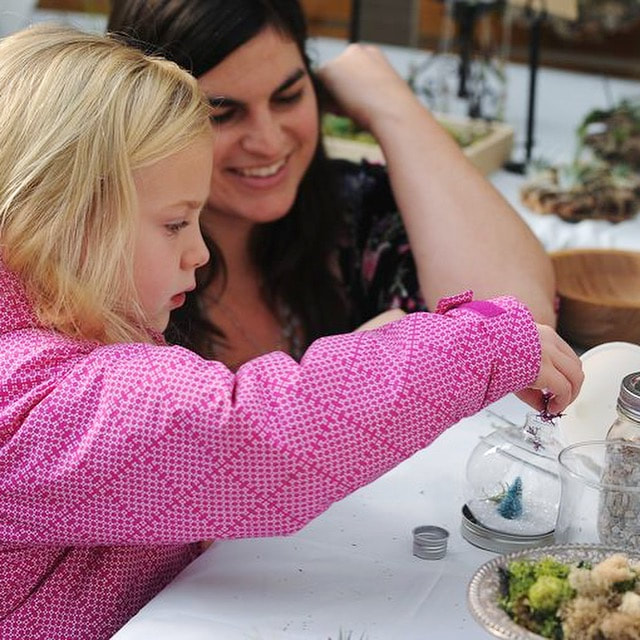
Day 3: Make a Terrarium Ornament
Day 3: Make a Terrarium Ornament
Last year I made a bunch of these for a craft fair and even set up a station to make them with kids. They were a big hit! There are so many variations. Start with a clear glass (or even plastic) craft ornament found at most craft stores and the sky's the limit. If you use air plants inside your ornament, know they are not meant to last in an enclosed environment very long. Let them stay in the "terrarium" for the next few weeks over the holidays and then take them out with tweezers before you pack everything up to let them breathe and live somewhere bright and airy in your home all year round.
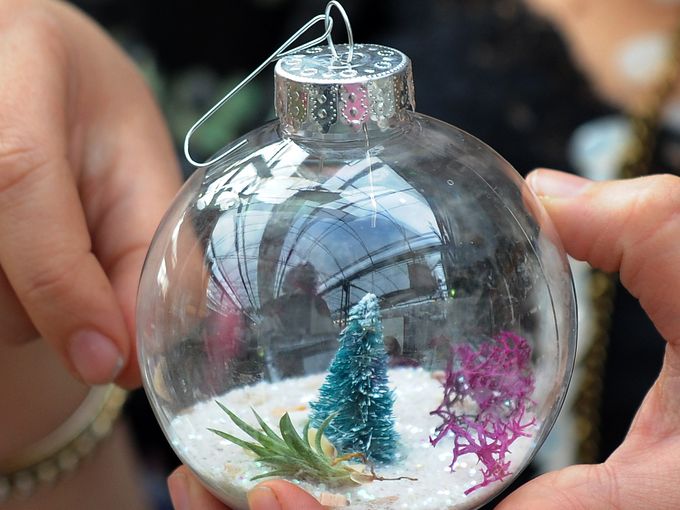
Christmas Tree Terrarium Ornament
What you need:
Make it: 1. Secure ornament on a cup or holder, so you can work without it rolling. 2. Roll in glitter and set aside to dry. Repeat with all pinecones 3. Place a small dot of glue on the base end of the bristle tree. 4. With tweezers, hold the top tip of the tree and gently lower inside the ornament until it reaches the bottom. Hold for a few seconds to secure in place. 5. With a funnel, add sand and glitter on top. 6. Add air plant, moss, or lichen to decorate. |
Variations:
There are so many options for these terrarium ornaments. Just be sure to keep the materials lightweight or the ornament top may slip off! Here are a few ideas:
|
December 6, 2017
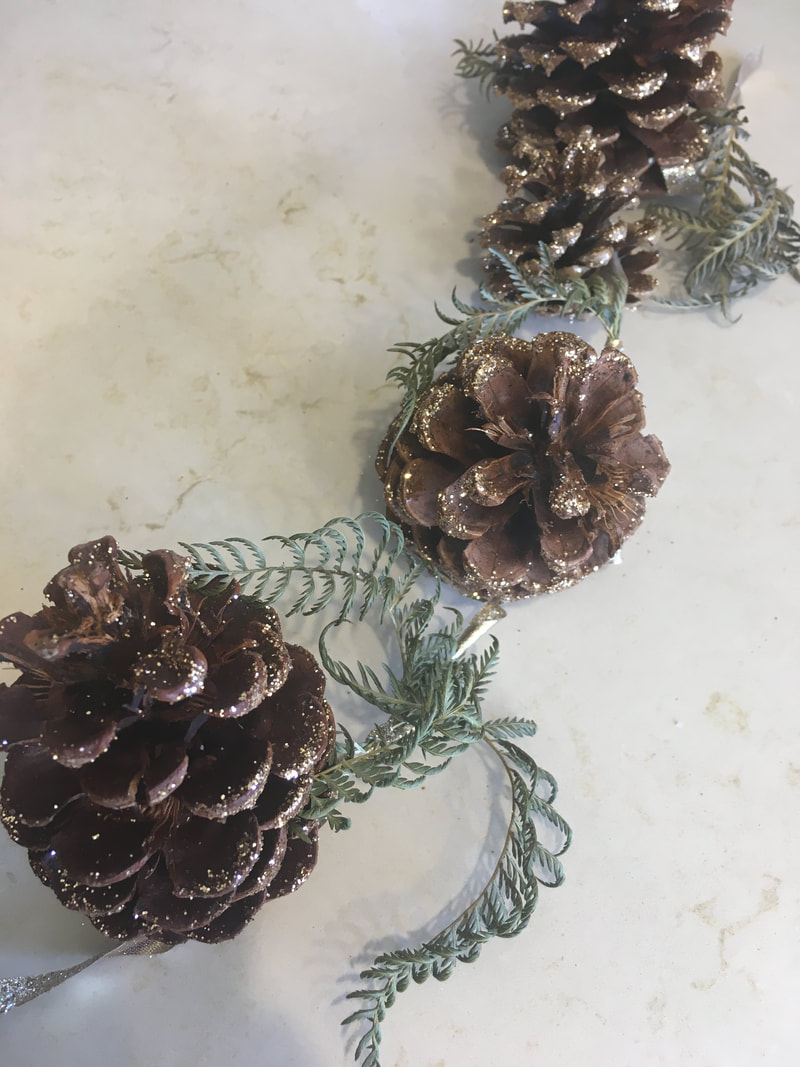
Day 2: Make a Retro Glitter Garland
Day 2: Make a Retro Glitter Garland
I saw this garland in Better Homes and Gardens Christmas past issue. It was first published in 1945. I've updated it with gold glitter, ferns and air plants, but you can use whatever color glitter and greens that you want. There's something so fun about rolling a pinecone in glue and glitter! Even if you don't make a whole garland, I dare you to give this a try this season to get in touch with your kiddo side (or do with your kids1).
|
What you need:
Make It: 1. Spray glue all around one pinecone 2. Roll in glitter and set aside to dry. Repeat with all pinecones 3. After drying, you can assemble the garland. Cut ribbon into 5' or longer, depending on how long you want your garland to be. 4. Wrap the ribbon around the first pinecone, about a third of the way from the bottom. You can tie if you want to, or just wrap once and tighten, so you no longer see the ribbon. 5. Repeat, alternating sizes. Between each pinecone, make a single knot and slip in greens. You can also slip greens into pinecones if they have sharp ends. 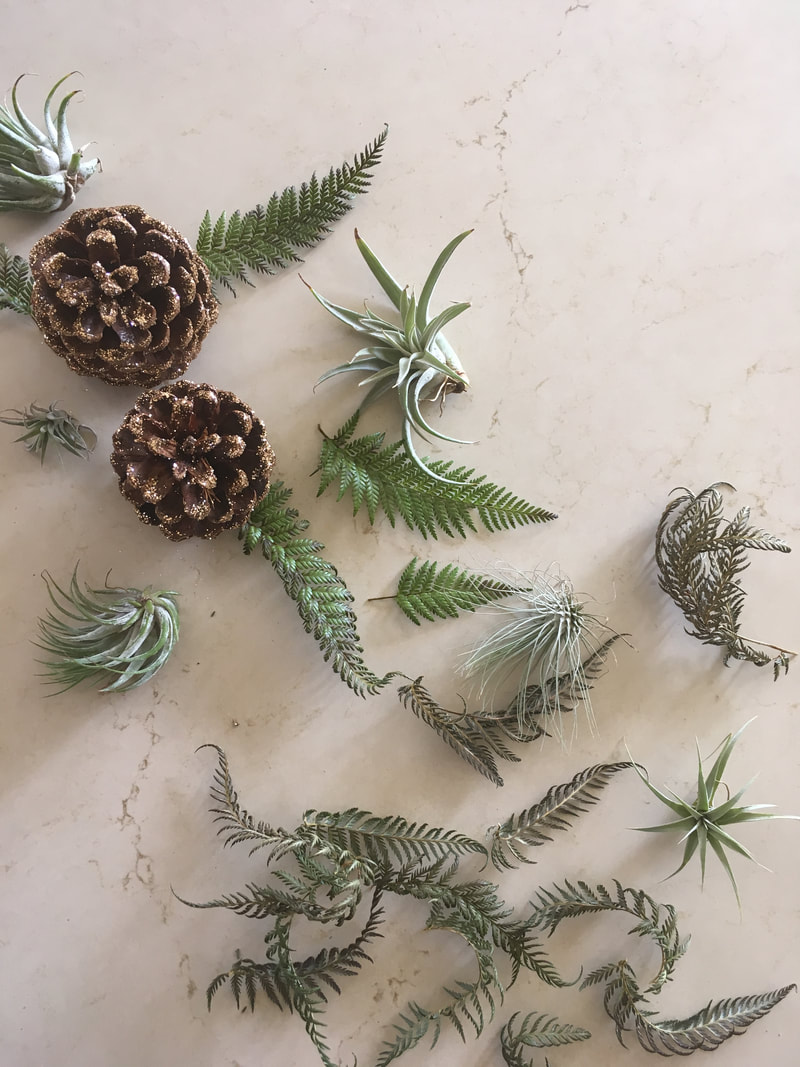
|
December 5, 2017
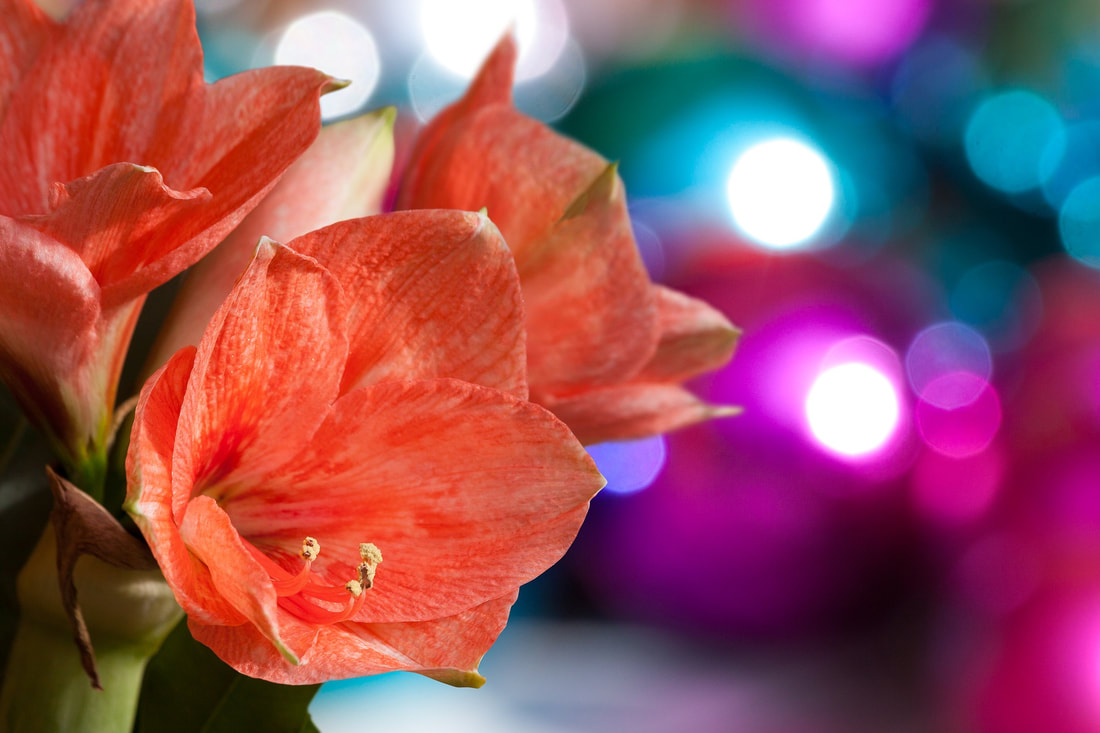
Day 1: Make a Winter Bulp Planter
Day 1: Make a Winter Bulp Planter
I love winter bulbs! Amaryllises, the big bold beautiful reds of the season, and paperwhites, the sweet reminders that spring will come again. Amaryllises remind me of my dad, who told me once that sometimes men like to get flowers too. Each year he buys himself an amaryllis kit from Home Depot. I decided to beat him to it this season and made two bulb planters, one for him and one for me!
|
What you need:
Make It: 1. Add soil to container, about halfway up, so that there's room to add bulbs. 2. Place bulbs on top of soil, so that their crowns are just above the container. 3. Fill in around bulbs with soil. 4. Water in bulbs. The soil should be lightly damp. 5. Add moss around bulbs. |
|
Care:
Place planted container in a place that gets bright indirect light. Water minimally until you see new green shoots and then water more regularly, keeping soil lightly moist. If the stalks lean, turn every couple days, so the plants grow upwards. To make blooms last, keep out of direct sunlight.
Timing:
Amaryllis take about 6-8 weeks to bloom after you plant and water. If you plant now, they'll have some action by Christmas and do their main show by late January, just when everyone needs a little post- holiday and mid-winter pick me up. Paperwhites take about 3-5 weeks to bloom, so if you plant now, they will be a sweet New Year's treat.
Post Bloom Care:
In the past, whenever I received amaryllis bulbs, I just threw them out after they bloomed. One year, though, I tried saving a particularly prolific bulb (8 blooms from one bulb!). To save, cut the stalk by the bulb and let dry out. Keep in a dry, cool place for at least 6 weeks before attempting to re-plant. You can get more details about post bloom care here.